Here is a quick and easy guide on uploading and installing a Windows Server 2019 iso with Vultr cheaply. Vultr is a trusted and reliable cloud computing business with a massive range of locations, features and vps plan sizes, check them out here.
Promo get a free $100 on new Vultr accounts here limited time!

At Vultr windows servers cost extra but you get the option to upload your own ISO file to use on the server. As this guide shows you how to do the upload and install of a Windows Server 2019.
Go to the deploy server section; You need to upload the custom Windows Server 2019 ISO, use this link here (build 17763.1) or make your own and host it.
Scroll down to section 2 (Server type) and click the “Upload ISO” tab and then the “Upload ISO” button below it, add in the url and click upload (you’ll have to wait a few minutes for it to upload). NOTE: You can only have 2 ISO’s uploaded and stored at the same time.

Scroll back up and choose your server location.
By now the ISO should have loaded make sure its selected (server2019.iso ). Now choose your instance size (amount of SSD space, ram and cpu amount). Do note that Windows server 2019 will run fine on the $5 per month option.
Dont worry about any of the other options (Additional features, startup scripts, SSH Keys), type in a server host name and label now click “Deploy now”.
Navigate to the server information page for the server you just deployed. You will have to wait up to a couple of minutes for the ISO to be mounted, once it has click the little computer screen in the upper right to view the console.
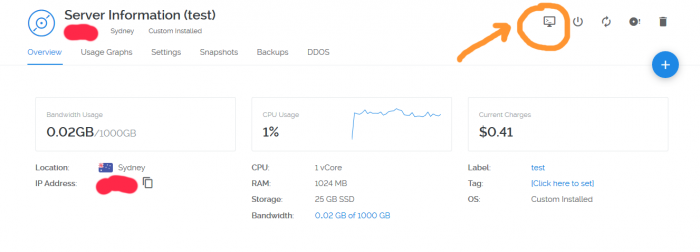
You will be greeted with this once it has been mounted:
Click next.
 Click the Install now button

It will prompt you to enter an activation key, simply click “I don’t have a product key” at the bottom to continue
 Choose either Standard or Datacenter edition, for this I choose Datacenter

Accept the terms

Click Custom: Install Windows only (advanced)

Select Drive 0 (or the drive with most space/ your boot drive) and click next

Wait a moment for it to install

Set the password for the Administrator account

Now press the Send CtrlAltDel button in the top right, Type in the password you just set and login.


You will now be logged in and the network will be automatically configured. You may get a prompt asking if this PC should be discoverable on this network click yes.
Enjoy your Windows Server 2019 Datacenter evaluation on Vultr.
