A current guide on installing and setting up a DayZ Standalone server by using SteamCMD, this guide also includes a server start batch file and a solution to download and auto-update mods.
This guide is made using Windows Server 2019 on Vultr with SteamCMD. This guide will also work on Windows 10, 8.1, Server 2016 and Server 2012 r2. You may need to install additional runtimes depending on your OS.
Limited time get $100 free credit for new Vultr accounts here!
Download SteamCMD here and move it into a folder in the C drive called SteamCMD.
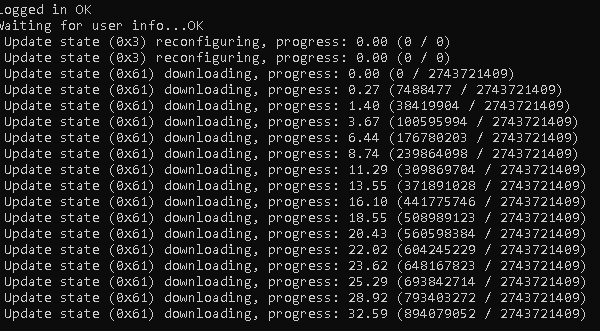
Run steamcmd.exe and SteamCMD will unpack into the folder
installserver.bat and fill it with:
@echo off
set "steamcmdpath=C:\SteamCMD"
set "serverpath=C:\servers\dayzserver"
set /p login=Steam Login:
echo.
set /p pass=Steam Password:
echo.
%steamcmdpath%\steamcmd +login %login% %pass% +force_install_dir "%serverpath%" +app_update 223350 validate +quit
Upon running this file it will install the DayZ server files into C:\servers\dayzserver.
For your server to be found in the DayZ launcher and other server browsers you will need to open certain ports. To do this open up Windows Defender firewall with Advanced security.
This is for a server running on port 2302
Ports that need to be opened for UDP are:
Inbound rules:
Outbound rules:
Ports that need to be opened for TCP are:
Inbound rules:
Outbound rules:
The basic batch file to start the server is this:
@echo off
:start
::Server files location
set serverLocation="C:\servers\dayzserver"
::Server Port
set serverPort=2302
::Server config
set serverConfig="C:\servers\dayzserver\serverDZ.cfg"
::Server profile
set serverProfile="C:\servers\dayzserver\PROFILENAME"
::Logical CPU cores to use (Equal or less than available)
set serverCPU=4
::DayZServer location (DONT edit)
cd "%serverLocation%"
echo (%time%) started.
::Launch parameters (edit end: -config=|-port=|-profiles=|-doLogs|-adminLog|-netLog|-freezeCheck|-filePatching|-BEpath=|-cpuCount=)
start "DayZ Server" /min "DayZServer_x64.exe" -profiles=%serverProfile% -config=%serverConfig% -port=%serverPort% -cpuCount=%serverCPU% -dologs -adminlog -netlog -freezecheck
You can find more complex starters that include BEC and restarting here.
If your DayZ server starts, shows up in the server browser/DZSA launcher and you can connect & play; now you can begin to install mods and implement a restart system.
Adding your server to DZSA Launcher is done by going here and inputting your server IP address plus the query port which is 27016.
Some common errors upon starting the server are:
To fix go here and install the x64 bit.
Install the runtime from here, note it takes a couple of minutes to install.
C:\servers\dayzserver\serverDZ.cfg has your server settings and options, importantly the server name, password options and mission file name.
C:\servers\dayzserver\PROFILENAME change from PROFILENAME in the start batch file, this is where your logs will be generated and where you put configuration files from mods when they state your server profile folder.
You need to get the mods workshop id and its @name, you can find its id by the number that is at the end of the workshop URL.
https://steamcommunity.com/sharedfiles/filedetails/?id=2106663048
The id is 2106663048.
Create installmod.bat in the C drive
Run this to download the mod, move the mod file into your server’s directory, rename it and copy the key.
@echo off

set "steamcmdpath=C:\SteamCMD"

set "serverpath=C:\servers\dayzserver"

set /p login=Steam Login:
echo.
set /p pass=Steam Password:
echo.
set /p workshopid=Workshop id:
echo.
set /p modname=Mod folder name:

echo.
%steamcmdpath%\steamcmd +login %login% %pass% +force_install_dir "%serverpath%" +workshop_download_item 221100 %workshopid% validate +quit
move 'C:\servers\dayzserver\steamapps\workshop\content\221100\%workshopid%' 'C:\servers\dayzserver\%modname%'
copy 'C:\servers\dayzserver\%modname%\Keys\*.bikey' 'C:\servers\dayzserver\keys\'

pause
DayZ Workshop mods can become annoyances when updates are pushed as players will have it updated immediately via the Steam client whilst the server will not.
Auto-updating mods can be handled through the DZSA server launcher, get it here.
Using this means you need to include it in your start batch file and reference the DayZ server executable (.exe):
start "Dayz_SA" /wait "DZSALModServer.exe" -mod=@modshere;@another;@mod "-dayzserver=DayZServer_x64.exe" ....
To implement a server restart system, create a batch file in the C drive called restartdayz.bat
Fill it with:
taskkill /f /im DayZServer_x64.exe
This kills the DayZ server 64-bit process.
Server restarts are going to be run through Windows task scheduler. This is super simple to setup, On the right choose create task:
Now make Daily triggers at certain times with the action being to run the C:\restartdayz.bat file.
Getting restart count down messages in the game chat for the restart time can be done in db/messages.xml which is found in your mission file at C:\servers\dayzserver\mpmissions\MISSIONNAME.
<?xml version="1.0" encoding="UTF-8" standalone="yes"?>
<messages>
   <message>
      <delay>0</delay>
      <repeat>0</repeat>
      <deadline>180</deadline>
      <text>Server is restarting in 1 hour</text>
   </message>
   <message>
      <delay>0</delay>
      <repeat>0</repeat>
      <deadline>195</deadline>
      <text>Server is restarting in 45 minutes</text>
   </message>
   <message>
      <delay>0</delay>
      <repeat>0</repeat>
      <deadline>210</deadline>
      <text>Server is restarting in 30 minutes</text>
   </message>
   <message>
      <delay>0</delay>
      <repeat>0</repeat>
      <deadline>225</deadline>
      <text>Server is restarting in 15 minutes</text>
   </message>
   <message>
      <delay>0</delay>
      <repeat>0</repeat>
      <deadline>230</deadline>
      <text>Server is restarting in 10 minutes</text>
   </message>
   <message>
      <delay>0</delay>
      <repeat>0</repeat>
      <deadline>235</deadline>
      <text>Server is restarting in 5 minutes</text>
   </message>
   <message>
      <deadline>238</deadline>
      <text>Server is restarting in 1 minute</text>
   </message>
   <message>
      <delay>0</delay>
      <repeat>0</repeat>
      <deadline>239</deadline>
      <shutdown>1</shutdown>
      <text>Server is shutting down now!</text>
   </message>
</messages>
<deadline> is in minutes.
A drained and empty Kennington reservoir images from a drone in early July 2024. The…
Merrimu Reservoir from drone. Click images to view larger.
Using FTP and PHP to get an array of file details such as size and…
Creating and using Laravel form requests to create cleaner code, separation and reusability for your…
Improving the default Laravel login and register views in such a simple manner but making…
Laravel validation for checking if a field value exists in the database. The validation rule…